Reference
Stick Guide
Everything you need to know to build your perfect custom stick. Use this as a reference while placing your order.
01
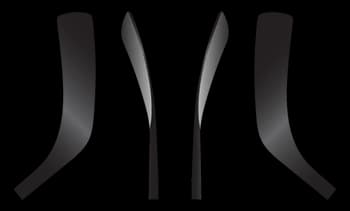
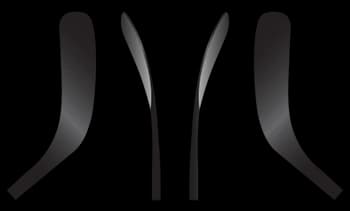
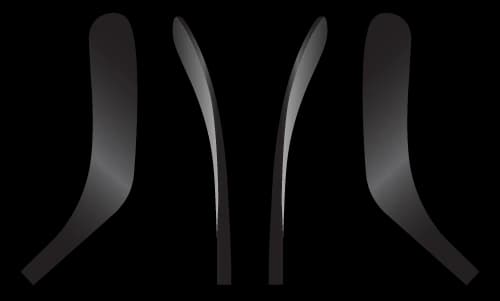
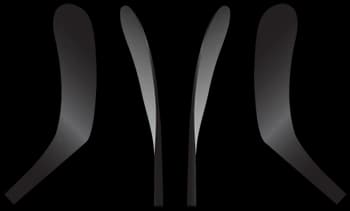
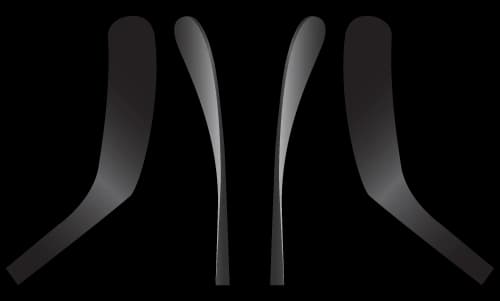
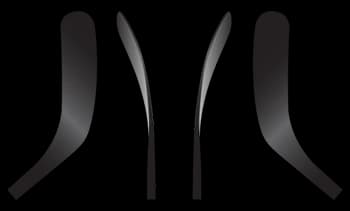
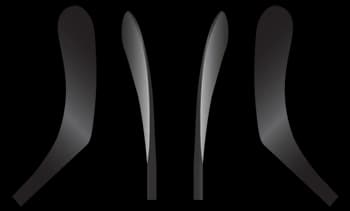
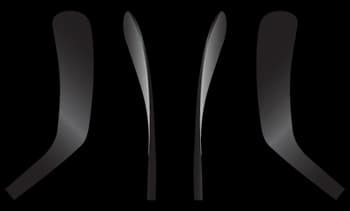
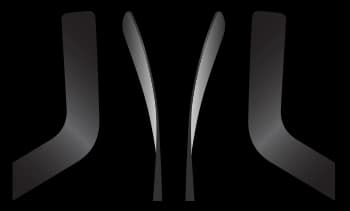
Blade Patterns
Choose the curve that matches your play style. Each pattern has different characteristics for shooting, passing, and puck handling.
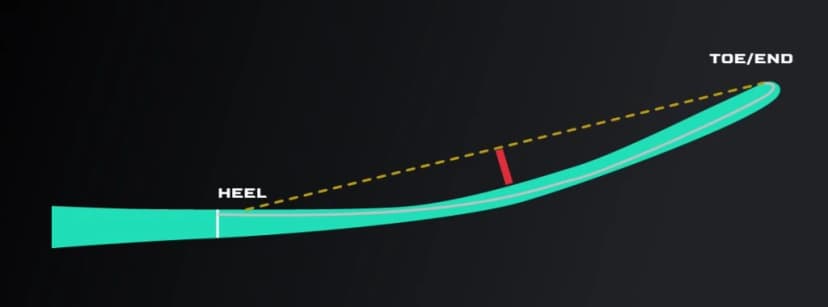
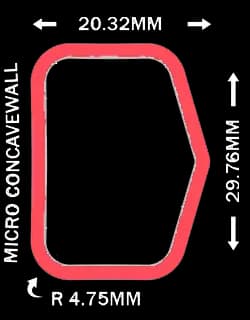
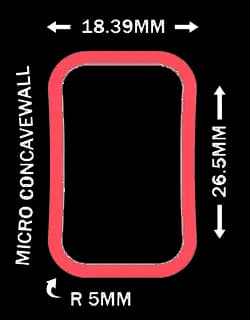
How Curve Depth is Measured
MH02
MH9
MH14
MH28 | MAX
MH77
MH88
MH8 Crazy Ovi
NEW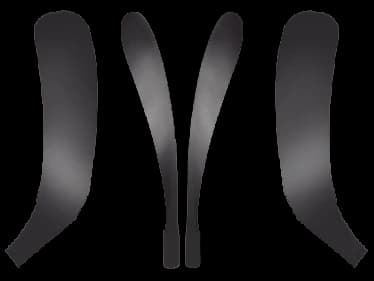
MH90TM
MH91A
MH92 | MAX
MH31 Goalie
02
Stick Colors
Your stick has three color zones — Shaft, Mid, and Blade — each can be a different color.
Transparent Finishes
Pantone Shining Colors
03
Sizing Guide
Stick length is measured from the heel of the blade to the top of the shaft. It should reach between your chin and nose without skates.
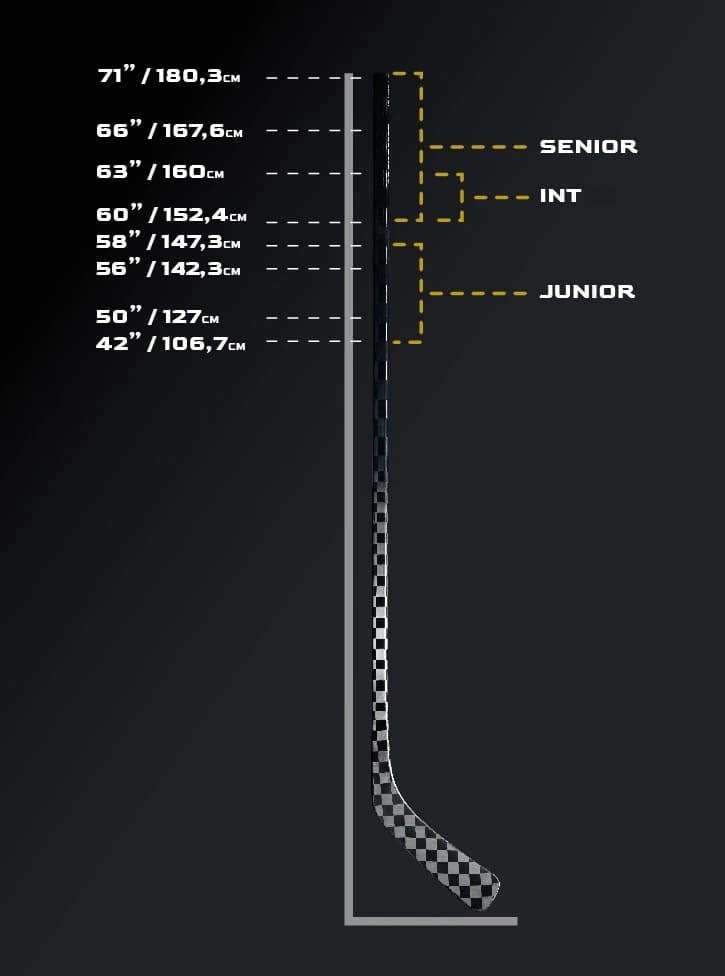
Length Measurement
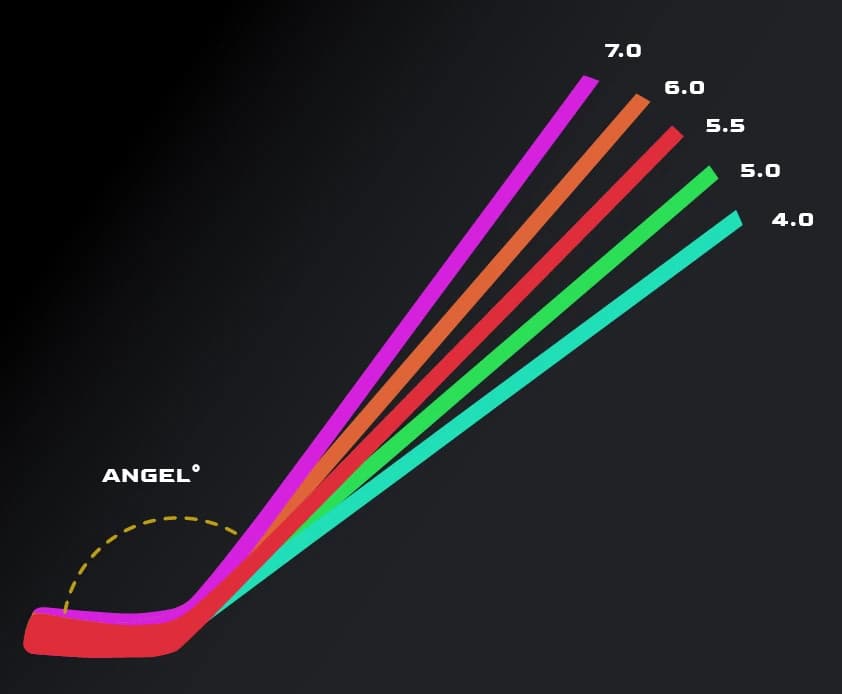
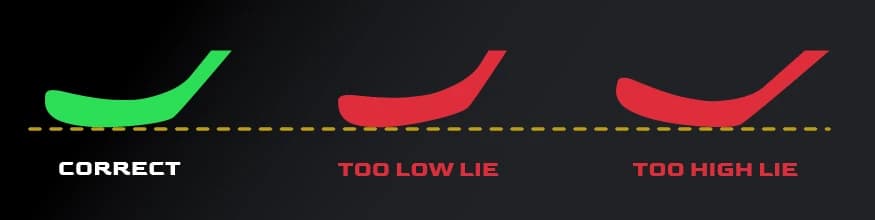
Lie Angle & Blade Contact
Senior
Intermediate
Junior
04
Color Zones
Each stick is divided into three zones that can each have their own color.
Upper Shaft
Top of the stick — the grip area
The upper portion you hold. Most visible section — this is where your name, number, or custom text goes. The most impactful zone for team color matching.
Mid Shaft
Center section between grip and blade
The transition zone. Using a different color here creates a striking two or three-tone look. A popular choice is to match your team's accent color.
Blade
From the hosel down to the toe
The part that contacts the ice and puck. Many players leave this dark carbon for a clean look and durability, but it can be any color in the palette.
Tip: Each zone can be a different color from our transparent or Pantone palette. When you set the upper shaft color and all three are the same, mid shaft and blade auto-update. Change them individually for a multi-color look.
05
Shaft Shapes
How the shaft feels in your hands. Each shape offers different grip and control characteristics.
Standard
Traditional rounded rectangular cross-section. The classic feel most players are used to.
Slightly Round
Rounded edges for a more ergonomic feel in the hands. Natural hand position, reduces fatigue on longer shifts.
Penta / Penta+
Five-sided cross-section with flat walls for improved grip and puck feel. Penta+ has more pronounced edges.
Junior
Smaller cross-section designed for younger players. Easier to grip and control for smaller hands.
06
Grip Options
The grip coating on the upper shaft. Affects how the stick feels in your gloves.

3D Soft Touch
Textured soft-touch coating with subtle 3D pattern. Great all-around grip with comfortable feel.
Matte Grip Diamond
Diamond-patterned matte grip for extra texture. Maximum control without bulk.

Marvic Goosebump Matte
Raised goosebump texture over matte coating. Premium feel with excellent glove grip.
Candy Cane Grip
Spiral-wrapped grip structure for consistent traction at any hand position.
Basketball Grip
Raised dimpled texture inspired by basketball surfaces. Maximum tactile control.
Fishbone Corner Grip
Grip material focused on the corners/edges of the shaft for targeted control.
Matte Grip
Smooth matte finish with consistent tackiness. Clean look, reliable hold.
No Grip
Clean, uncoated shaft. For players who tape their own grip or want a slick feel.
07
Kick Point
Where the shaft flexes during a shot. This determines how energy transfers from your hands to the puck.
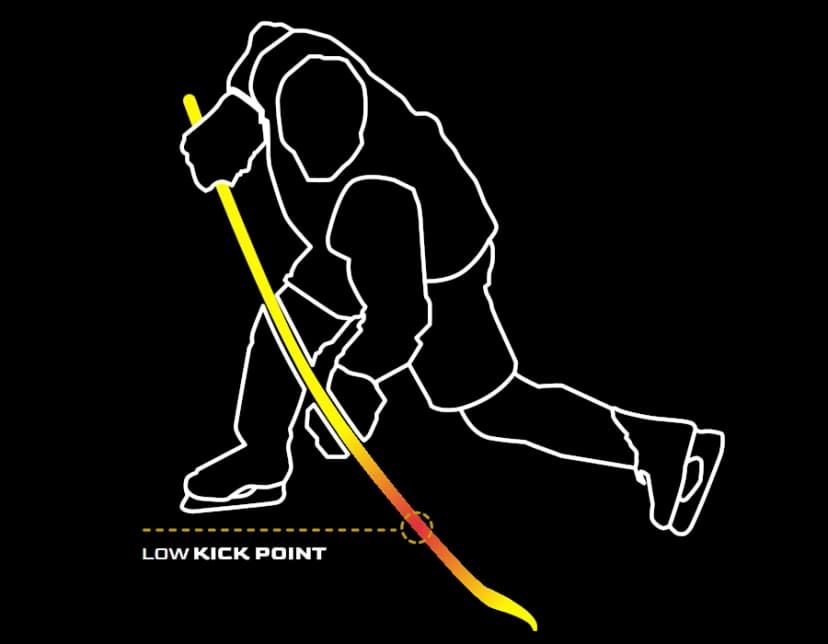
Low Kick
Flex point near the blade for lightning-fast wrist and snap shots. The shaft loads and releases quickly for a rapid release. Best for forwards who shoot in tight.

Mid Kick
Flex point in the center of the shaft for maximum power. Stores more energy for harder slap shots and one-timers. Best for defensemen and power shooters.

High Kick
Flex point high on the shaft for maximum loading distance. Traditional defenseman choice — generates raw power for long-range shots and clears.
08
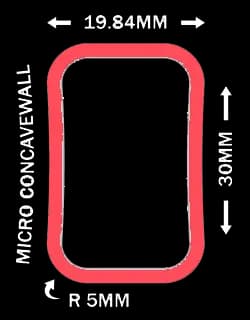
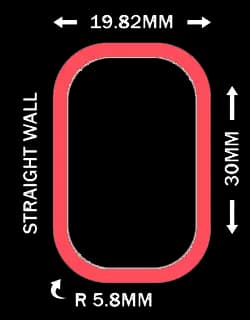
Blade Specs
Fine-tune your blade's stiffness and surface texture for your play style.
Blade Hardness
Blade Surface
09
Flex Rating
Flex measures how much force (in pounds) is needed to bend the shaft one inch, measured at a standard 40" length. A lower number means a whippier stick.
General Rule
Divide your body weight (in lbs) by two for a starting point. Adjust down for quicker release, up for more power. Forwards typically go softer, defensemen stiffer.
Length Affects Feel
Cutting a stick shorter makes it feel stiffer. Adding length makes it feel softer. A 75 flex at 66" will feel different than a 75 flex cut to 62". Factor this into your choice.